How to Schedule Coupons in WooCommerce (and Save Time)
Have you ever wanted to schedule coupons on your online store?
Scheduling coupons allows you to easily run seasonal or time-sensitive sale campaigns without having to worry about turning it on / off at specific times.
In this guide, we’ll share our step by step process on how to easily schedule coupons in WooCommerce (and save time).
Why Create Scheduled Coupons in WooCommerce?
Coupons are a great way to promote your online store and make more sales.
However creating coupons for different holiday campaigns, making the sale go live at certain times, and then turning it off at the deadline can be a lot of work.
This is why all smart store owners schedule coupons and promotion campaigns (like popups, notice bars, etc), so they can automatically start and end at specific date / time without any manual intervention.
For instance, you can schedule coupons for top holidays like Black Friday, Christmas, New Years, Mother’s day, Valentine’s day, and so on.
This allows you to save extra time, so you can focus on promoting the sale to get maximum results.
Or if it’s a holiday promotion, then you can use this extra time and spend it with your family and friends.
That being said, let’s take a look at how to easily schedule coupons in WooCommerce.
The first part of the tutorial covers scheduling coupons in WooCommerce, and the second part covers how to schedule coupon promotional material such as alert bars, popups, etc, so you can automate the entire process.
Creating a Scheduled Coupon in WooCommerce
For this tutorial, we’ll be using the Advanced Coupons plugin. It is the best WooCommerce coupon code plugin on the market, and it adds tons of powerful features to the default WooCommerce coupon functionality.
First, you need to install and activate the Advanced Coupons plugin. For more details, check out our step by step guide on how to install a WordPress plugin
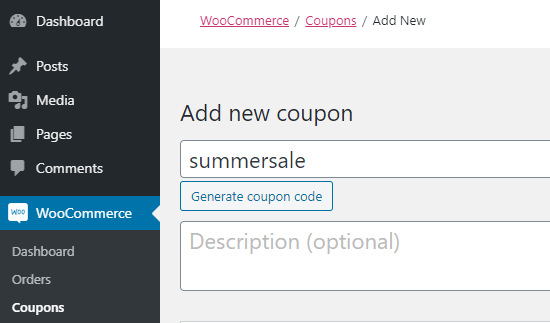
Upon activation, you need to visit WooCommerce » Coupons page in your WordPress dashboard.

Next, you need to click the ‘Add Coupon’ button to create a new coupon. You will be asked to type in the coupon code you want to use at the top of the screen.
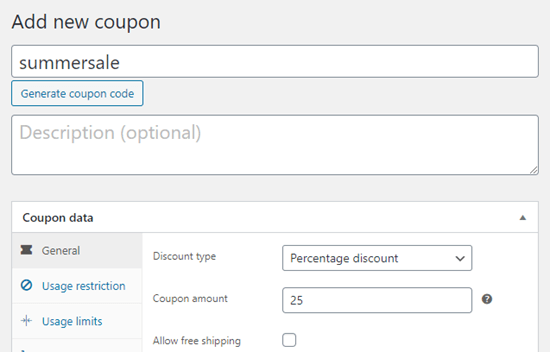
After that you need to decide what type of coupon you want to use.
For this tutorial, we’re going to use a percentage discount. You can select the ‘Discount Type’ from the dropdown list and then type in the percentage.
Next, we need to click on the Scheduler tab that’s added by the Advanced Coupon and enter a start date / end date for your coupon.
If you want, you can also change the default error messages that will be shown if customers try to use the coupon code too soon or too late.

Tip: The coupon will start at 12:00:00 on the start date and will expire at 23:59:59 on the day before the end date. Advanced Coupons uses the timezone that you’ve set in WordPress. You can check or change this under Settings » General in your WordPress admin area.
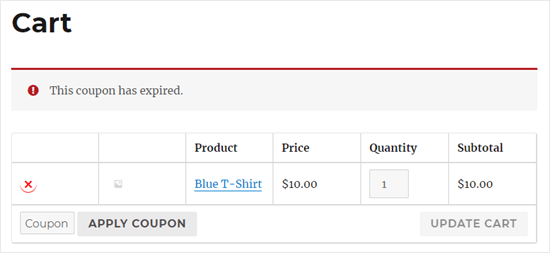
Once you’re done, you can go ahead and publish the coupon. If a customer tries to use it before the correct date, then they’ll see the error message on the shopping cart page.
Aside from saving you time, another benefit of scheduling coupons is that you can use it to boost your marketing efforts. For example, you can use your email marketing service to send a bulk email to all your affiliates / partners, and let them know about the upcoming promotion and the code, so they can share it with their audience.
With Advanced Coupons plugin, you can schedule as many coupon codes as you want, so you can save time and use it to grow your business.
For our eCommerce sites, we plan our sales calendar at the beginning of the year. Since we run a lot of the same sales, this helps us automate parts of the operation process.
Promoting Your Scheduled Coupons in WooCommerce
Now that you have scheduled coupons for different sale campaigns in your store, you still need to promote them.
Often popular stores use dynamic website elements like floating header bar, exit intent popups, slide-in scroll boxes, etc to highlight their sales and promotions.
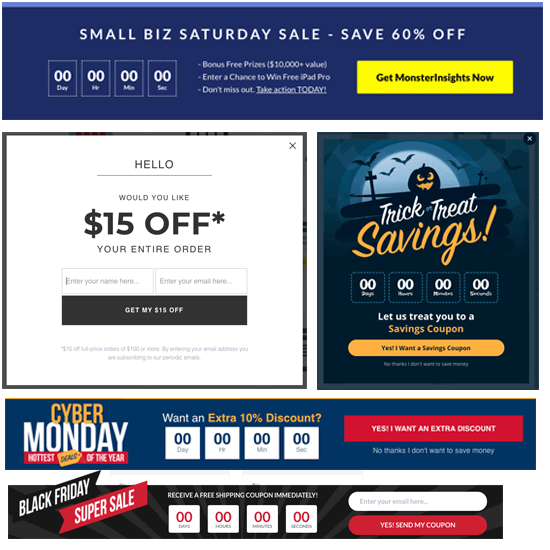
The best part is that you can automate these too with OptinMonster. It is the best conversion optimization software on the market that helps you convert website visitors into email subscribers and paying customers.
OptinMonster comes with countdown timers, coupon code popup, slide-in boxes, and other tools that help you promote your sales and boost conversion.
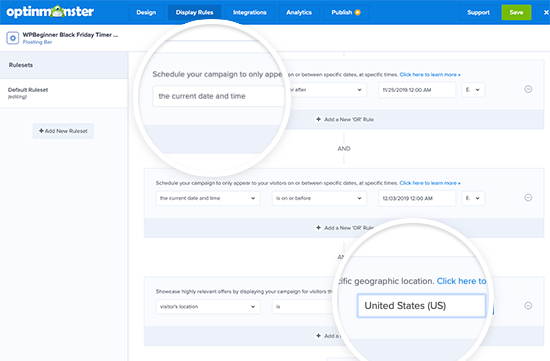
You can use their powerful display rules technology to not only schedule each campaign, but you can even use it to personalize them based on user’s geolocation. For example, you can automatically schedule a Christmas Sale for US and schedule a Diwali sale in India.
We hope this article helped you learn how to create a scheduled coupon in WooCommerce, so you can automate your sales. You might also like our article on the best WooCommerce plugins for your store, and our comparison of the best WooCommerce hosting companies.
If you liked this article, then please subscribe to our YouTube Channel for WordPress video tutorials. You can also find us on Twitter and Facebook.
