How to Customize WooCommerce Emails (2 Easy Ways)
Do you want to customize the layout and design of your WooCommerce emails?
WooCommerce emails help customers get information about their order status, time of delivery, and more. Customizing these emails can get more conversions and help build your brand.
In this article, we’ll show you how to customize WooCommerce emails, and even create WooCommerce email automation to grow your sales.

Why Customize Your WooCommerce Emails?
When running a WooCommerce store, your customers will receive different transactional emails. These emails help them get order confirmations, track their order status, get invoices, learn about how to return a product, and find more information about your online store.
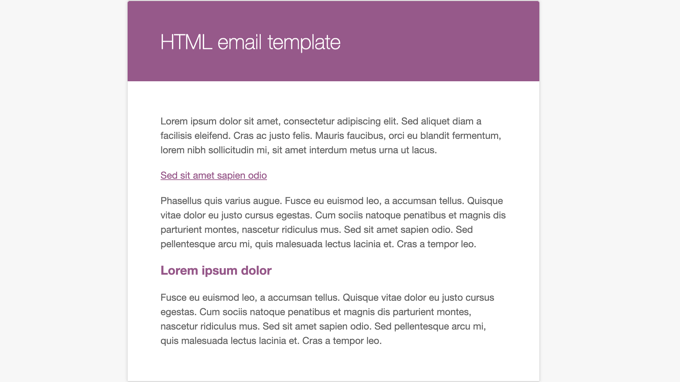
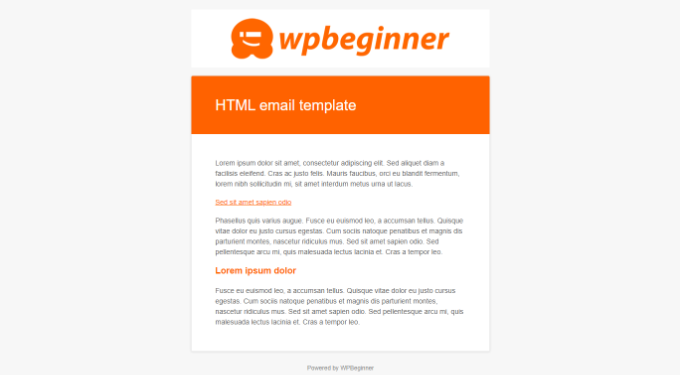
By default, the design and layout of emails sent by WooCommerce are plain and generic. Most business owners don’t customize them and use the standard template, which looks like this:

Customizing your WooCommerce email opens up a lot of opportunities. When your emails match your brand, it helps build trust with your customers, boost brand awareness, and get them to return to your store.
You can even include discount coupons, show popular products, or announce an upcoming sale in your WooCommerce emails. As a result, you’ll get more sales by encouraging people to purchase more products.
That said, let’s see how to customize your WooCommerce emails. We will cover two methods: default WooCommerce email settings, and a powerful email automation plugin for WooCommerce with drag & drop email customizer and workflow builder.
Customizing WooCommerce Emails using Global Settings
To edit the text and basic colors of your WooCommerce emails, you can use the default global settings in WooCommerce.
Simply head to WooCommerce » Settings from your WordPress admin panel and then click the ‘Email’ tab.
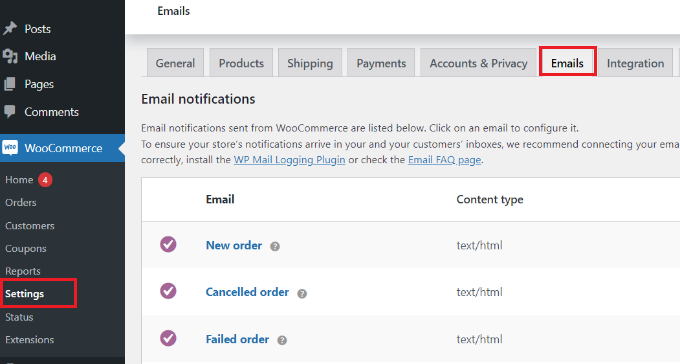

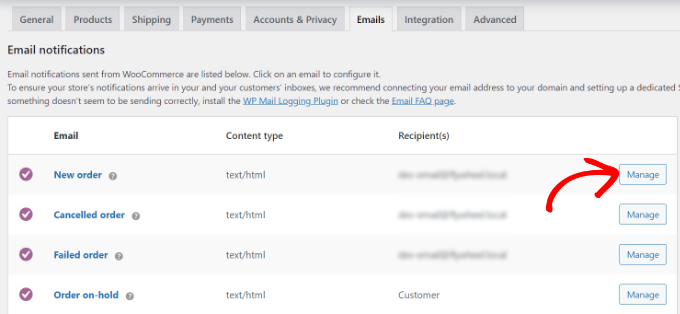
Here you’ll see all the emails WooCommerce sends to your customers, including emails for new orders, canceled orders, failed orders, orders refunded, password reset, new accounts, and more.
Next, you can scroll down to the Email sender options and Email template section. Under these sections, you’ll have options to edit the from name and email address.
Plus, you can customize your WooCommerce emails by adding a header image, footer text, changing the base color, background color, and body text color to match your brand.
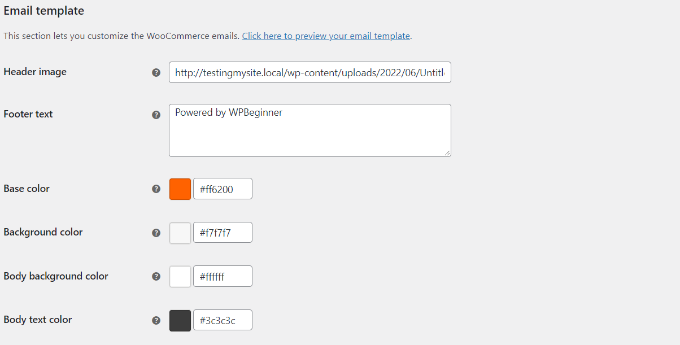

When you’re done, don’t forget to save your changes. Do note that these changes are global and will affect all your WooCommerce emails.
You can even preview the changes by clicking the ‘Click here to preview your email template’ link.
Here’s a preview of a customized WooCommerce email on our demo website:

WooCommerce also lets you customize each individual email.
In the Email tab in WooCommerce settings, you can click on any of the emails or click the ‘Manage’ button to see settings for a specific email.

After that, you can customize different elements of the email.
For example, enter a new email subject line, content, email heading, and email type.
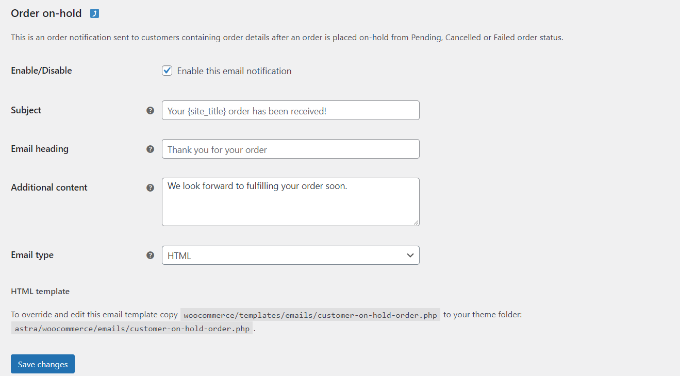

Go ahead and click the ‘Save change’ button when you’re done.
Customizing WooCommerce Emails using Autonami
Another way you can customize your WooCommerce emails is by using Autonami which is a popular WooCommerce plugin for marketing automation.
Aside from letting you fully customize your WooCommerce emails, it also lets you setup smart automated follow up emails and workflows to boost your sales.
First, you’ll need to install and activate the Autonami plugin. For more details, please see our guide on how to install a WordPress plugin.
Upon activation, you can go to Autonami » Automations from your WordPress dashboard to see their ever-growing pre-built WooCommerce email library that’s proven to get results.
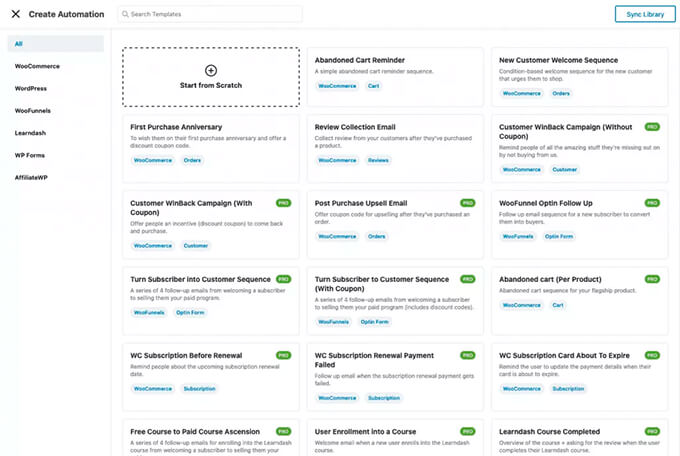

With a single click, you can import the entire email automation workflow with pre-written email copy, delay intervals, goals, and more.
Then you can use the visual email automation builder to make any customizations that you need. For example, here’s the workflow for the abandoned cart recovery email in WooCommerce.
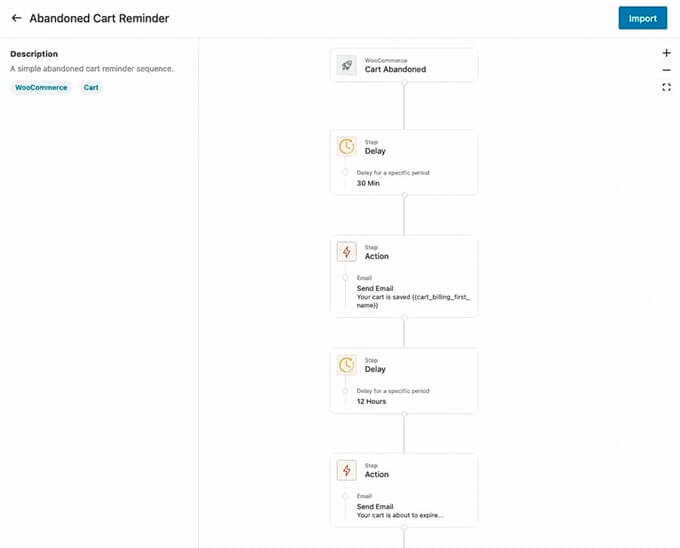

Autonami lets you customize any WooCommerce email and even create custom WooCommerce emails by using a drag & drop email builder inside WordPress.
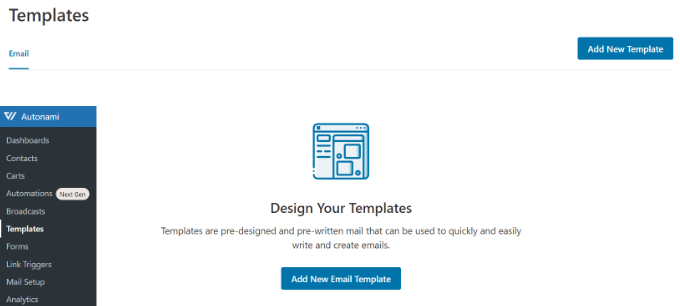
You can go to Autonami » Templates from your WordPress dashboard and click the ‘Add New Email Template’ button.

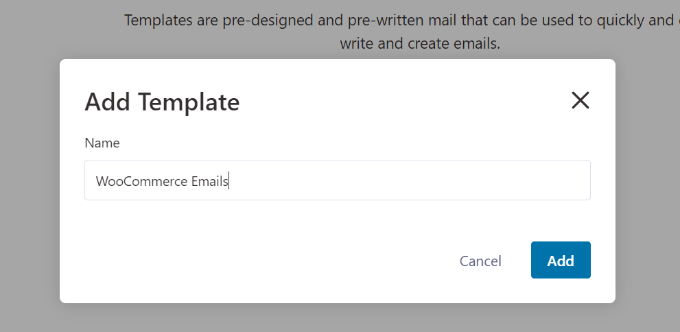
Next, you can enter a name for your email template.
Simply click the ‘Add’ button to continue.

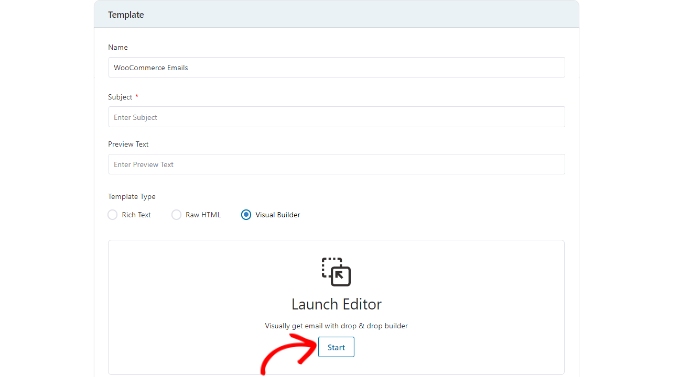
After that, the plugin will let you select a subject line for your email and a preview text.
Besides that, you can customize the content of your WooCommerce emails using 3 methods, including Rick Text, Raw HTML, or Visual Builder.
Go ahead and select the ‘Visual Builder’ option and click the ‘Start’ button.

This will launch the drag and drop email builder.
You can simply select different elements from the menu on your left and place them on the template.
For instance, in the ‘Content’ tab, you can add columns, buttons, heading, menu, text, and more.
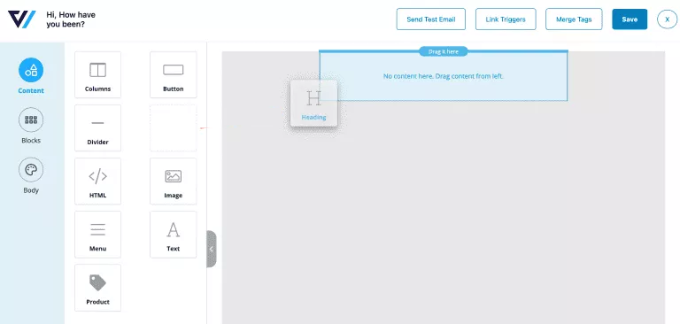

If you go to the ‘Body’ tab, then you can then further customize each element, like edit the text color, its alignment, font, size, and more.
Once you’re done, you can click the ‘Save’ button at the top.
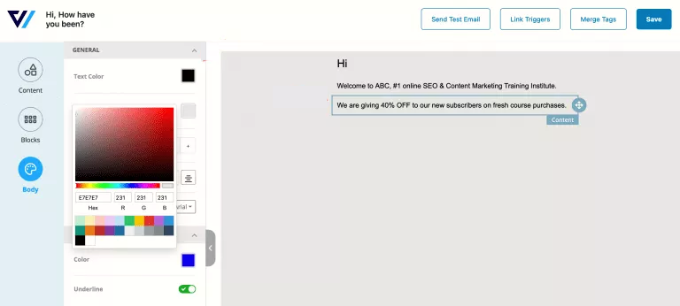

There’s even an option to send a test email to a given address and see what your WooCommerce emails will look like.
You can now repeat these steps and create as many custom WooCommerce emails as you want.
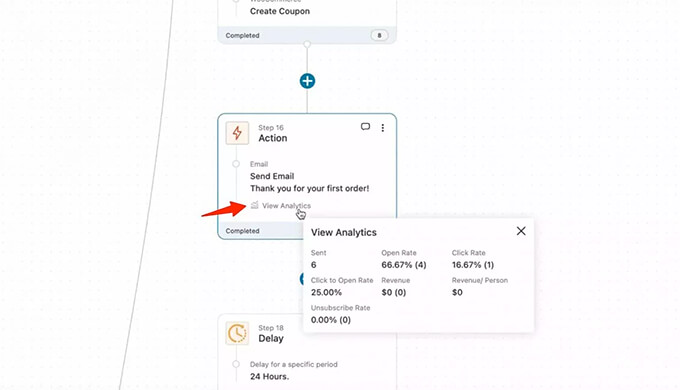
What makes Autonami really powerful is the custom goals driven email automation builder that shows you in-line analytics for each email.

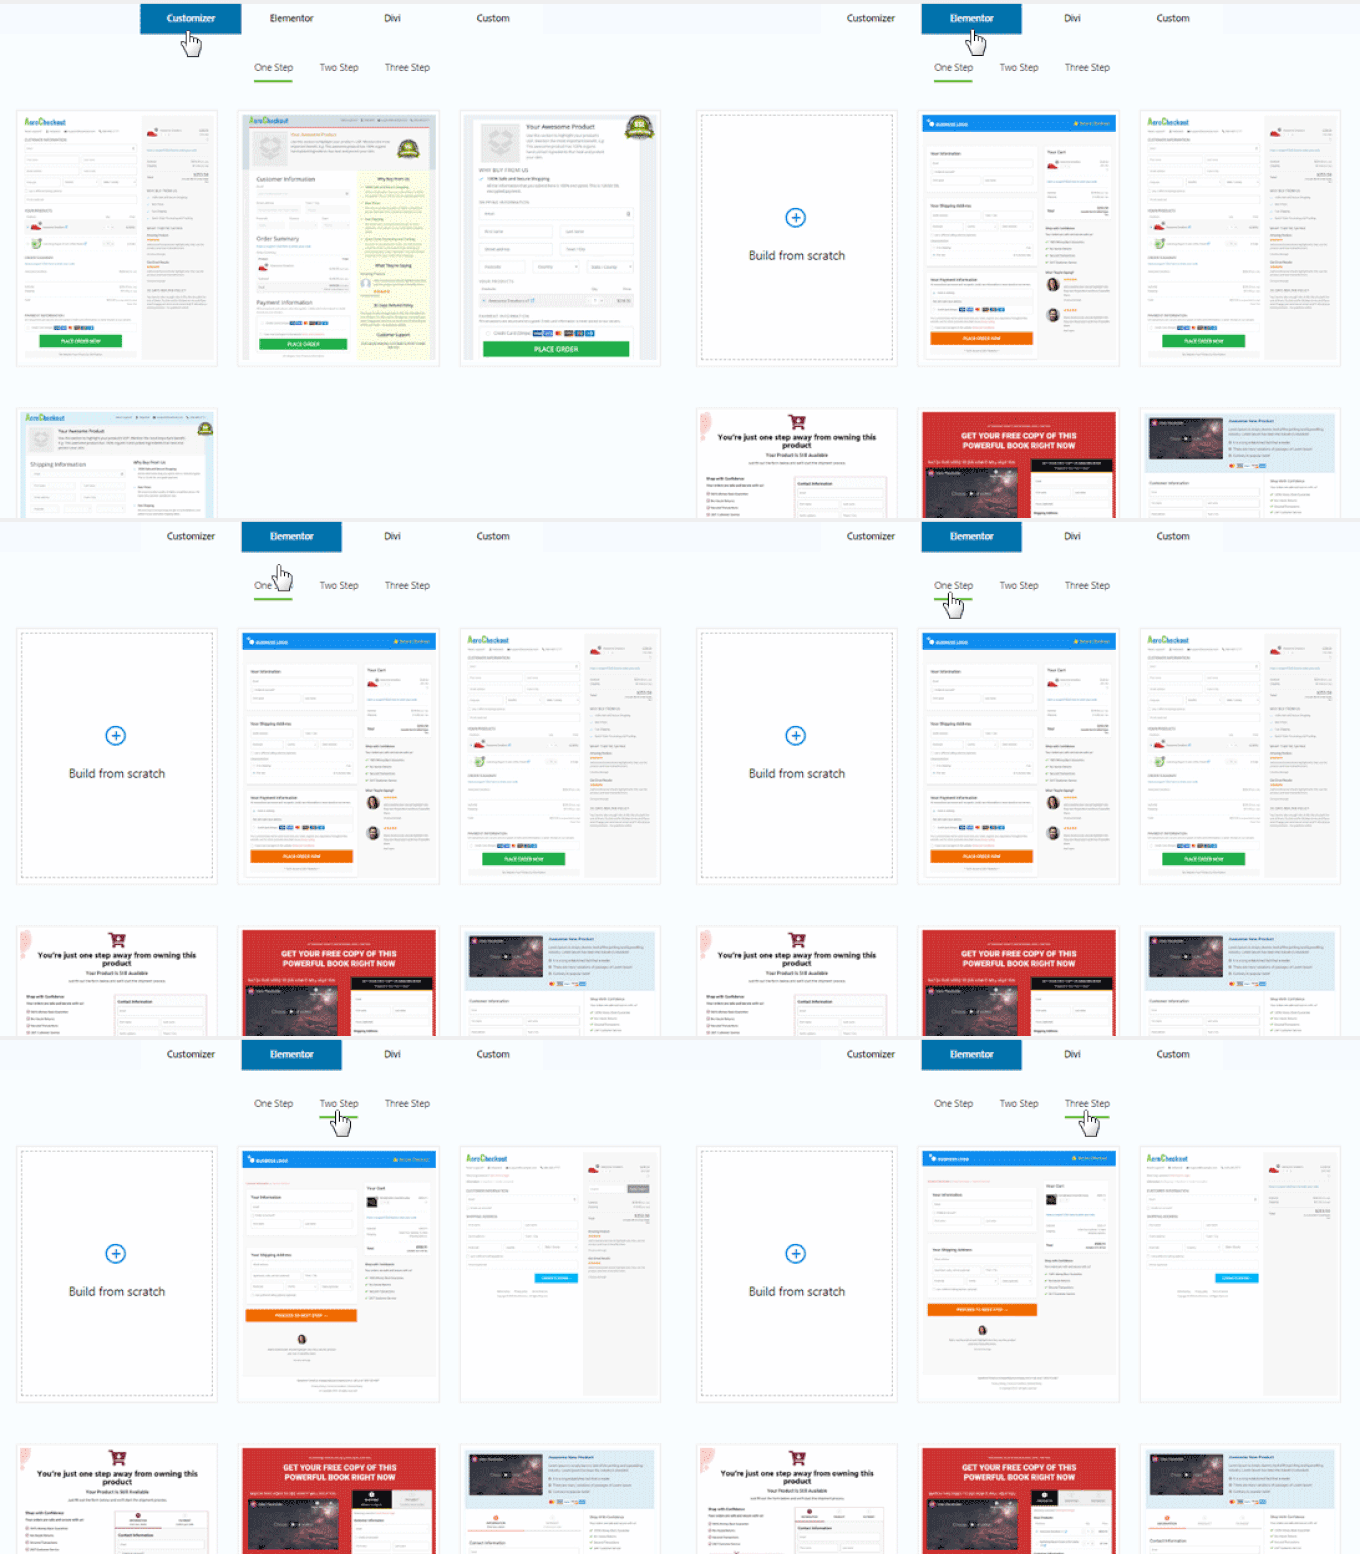
Autonami is a sister product to WooFunnels which is a powerful sales funnel builder for WooCommerce. You can use it to create a full sales funnel from start to finish and maximize your sales. It comes with prebuilt templates for custom checkout pages, order bumps, one-click upsells, and more.

If you’re serious about growing your WooCommerce store, then Autonami is a must-have solution.
Bonus: Fix WooCommerce Email Not Sending Issue
Sending email directly from WordPress can lead to deliverability issues. That is because WordPress uses PHP mail() function to send an email and most web hosting companies don’t have it properly configured.
As a result, your WooCommerce emails don’t reach the recipients or end up in the spam folder. To fix this issue, you can use an SMTP service. SMTP or secure mail transfer protocol is a standard way to send emails and ensures that emails reach your customer’s inbox.
WP Mail SMTP is the best SMTP service for WordPress. It dramatically improves email deliverability and solves the problem of emails going missing or ending up in spam folders.
WP Mail SMTP is compatible with different mailers like Sendinblue, Amazon SES, Microsoft Outlook, Gmail, and more. Plus, it easily integrates with WooFunnels.
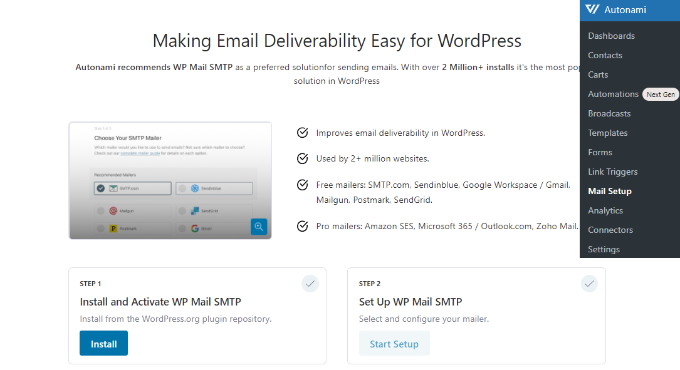
To connect WP Mail SMTP with WooFunnels, simply go to Autonami » Mail Setup from your WordPress dashboard.
After that, click the ‘Install’ button to install and activate WP Mail SMTP. Once installed, simply click the ‘Start Setup’ button and follow the onscreen instructions to configure the plugin.

You can follow our detailed guide on how to set up WP Mail SMTP with any host to get started.
We hope that this article helped you learn how to customize WooCommerce emails. You may also want to see our guide on the best business phone services and the best WooCommerce hosting for your store.
If you liked this article, then please subscribe to our YouTube Channel for WordPress video tutorials. You can also find us on Twitter and Facebook.
